
Scale models
Your design, scaled down and 3D printed
A model built from the production CAD you already have, for trade stands, meeting rooms and anywhere the real thing is too large to bring. Accurate where it counts, and made to be handled.
Recent work
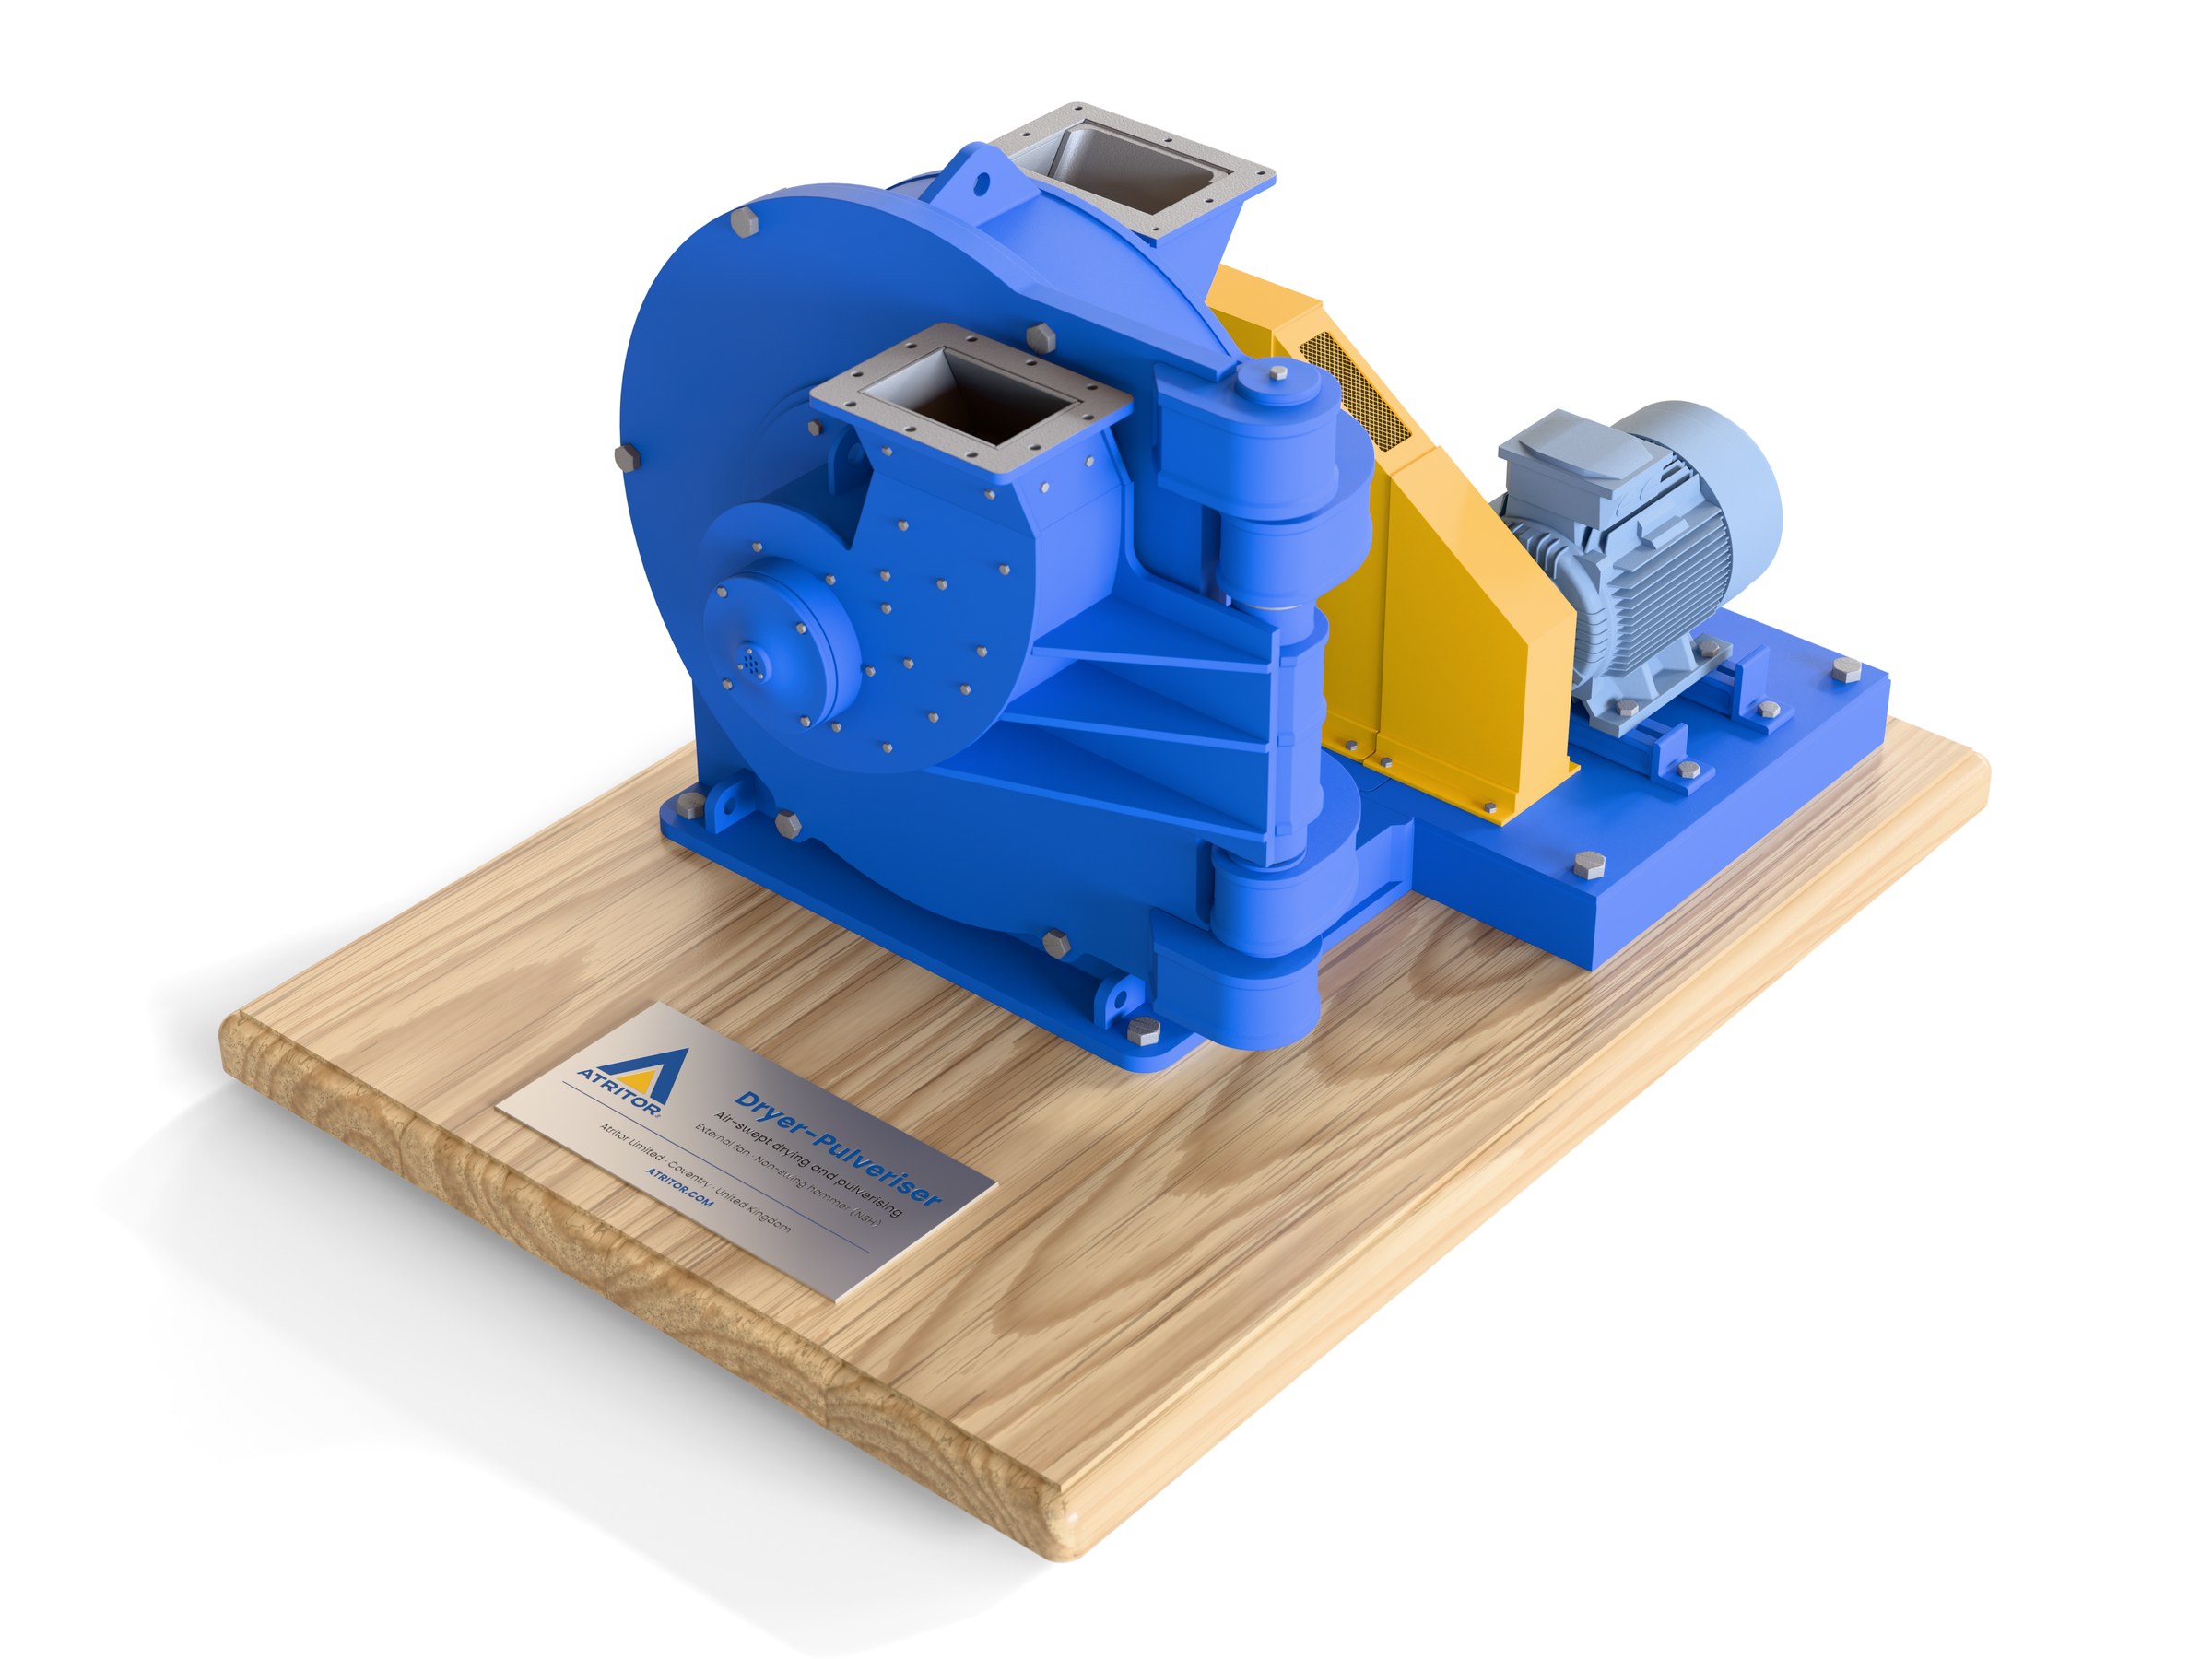
The complete model as delivered
Dryer-Pulveriser
The example here is a Dryer-Pulveriser, a machine that grinds and dries material in a stream of hot air. It was built from the manufacturer’s own production CAD, printed in around a hundred individual parts, then assembled with fasteners, inserts and bearings.
Both doors open and the rotor shaft turns. The liner plates and rotor segments are held by magnets and can be taken out — the parts that wear in service and get replaced, which makes the model a useful demonstration and teaching piece.
1:8 scale · Oak base with adjustable feet
Closer in
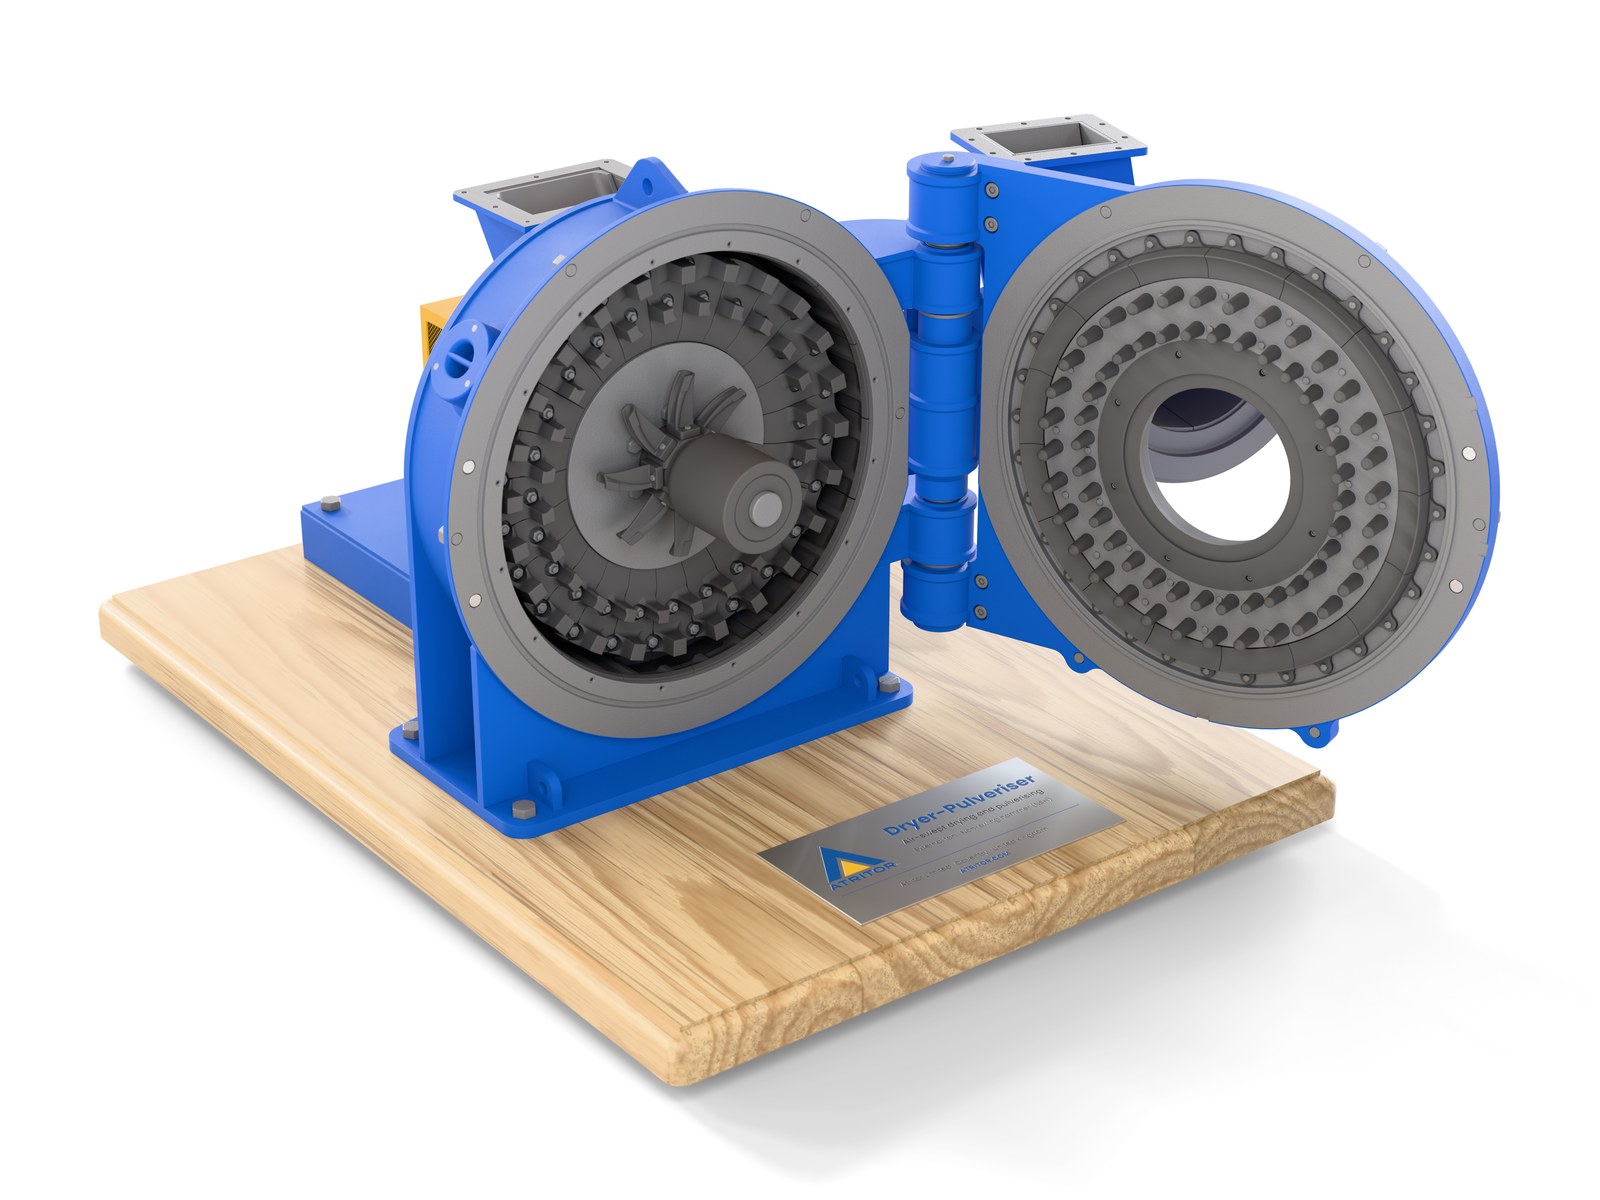
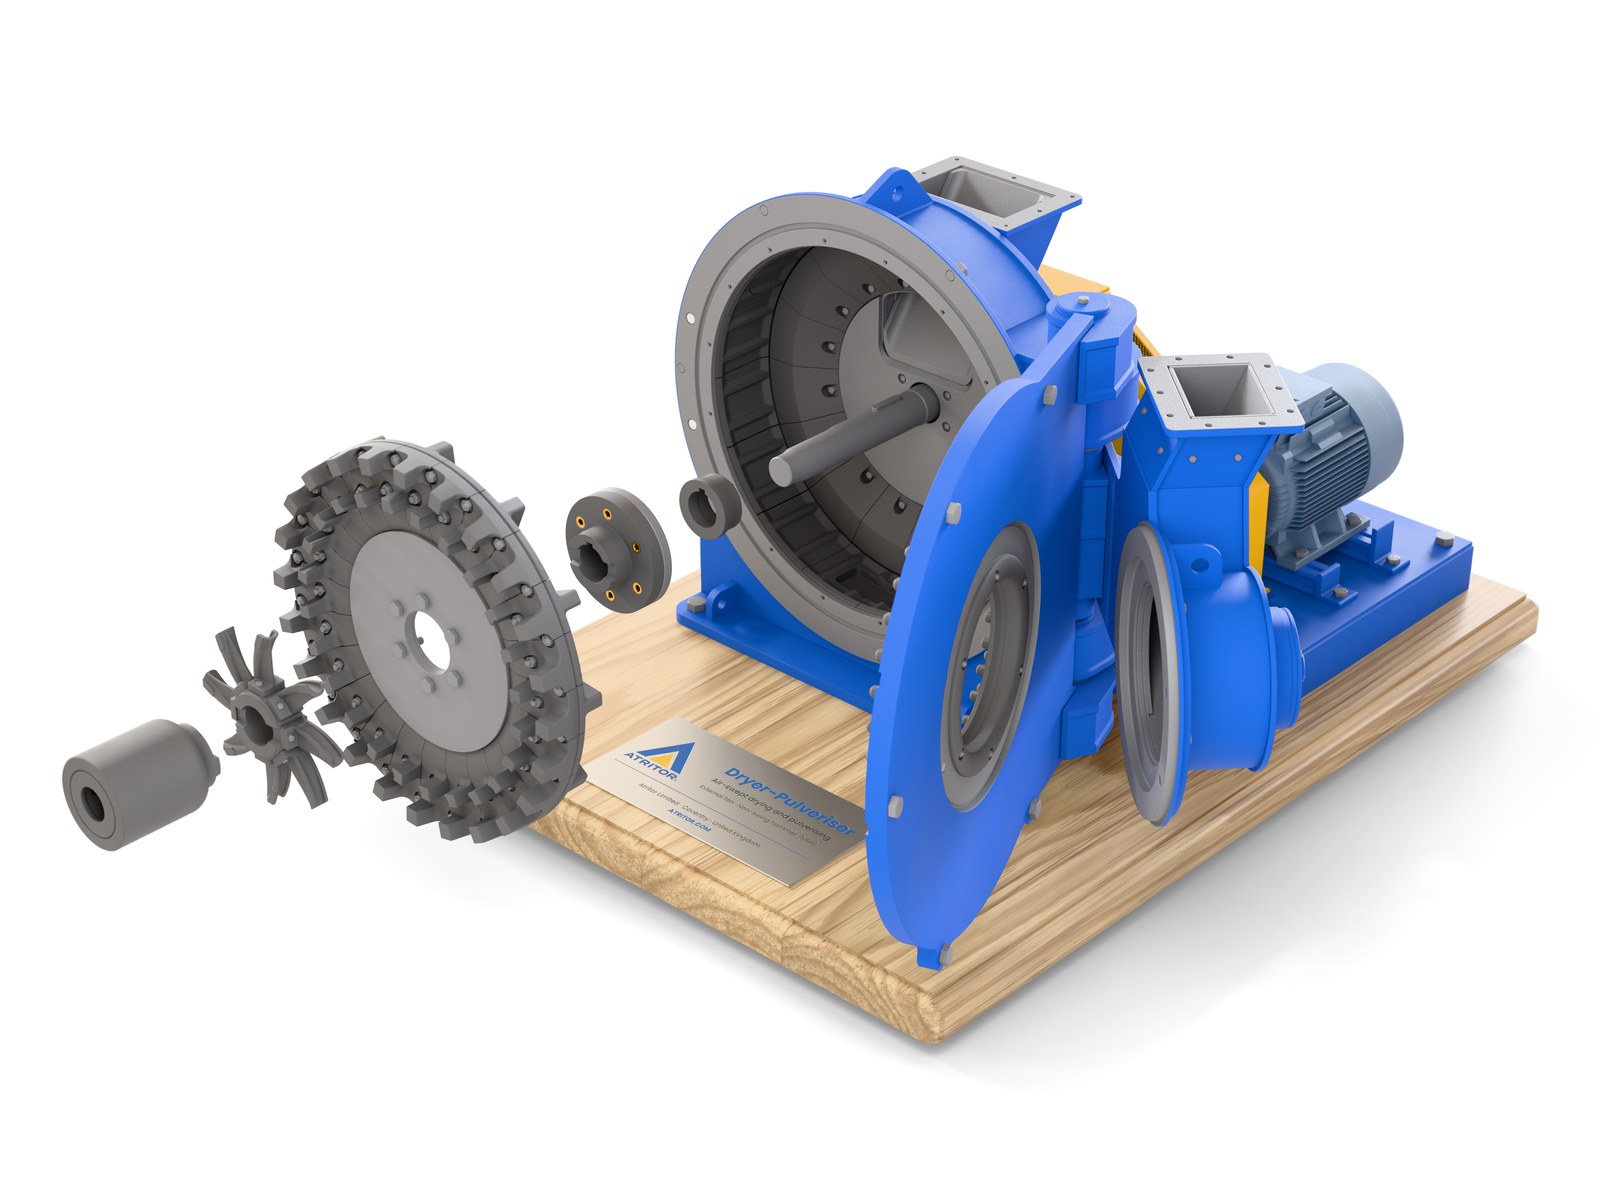
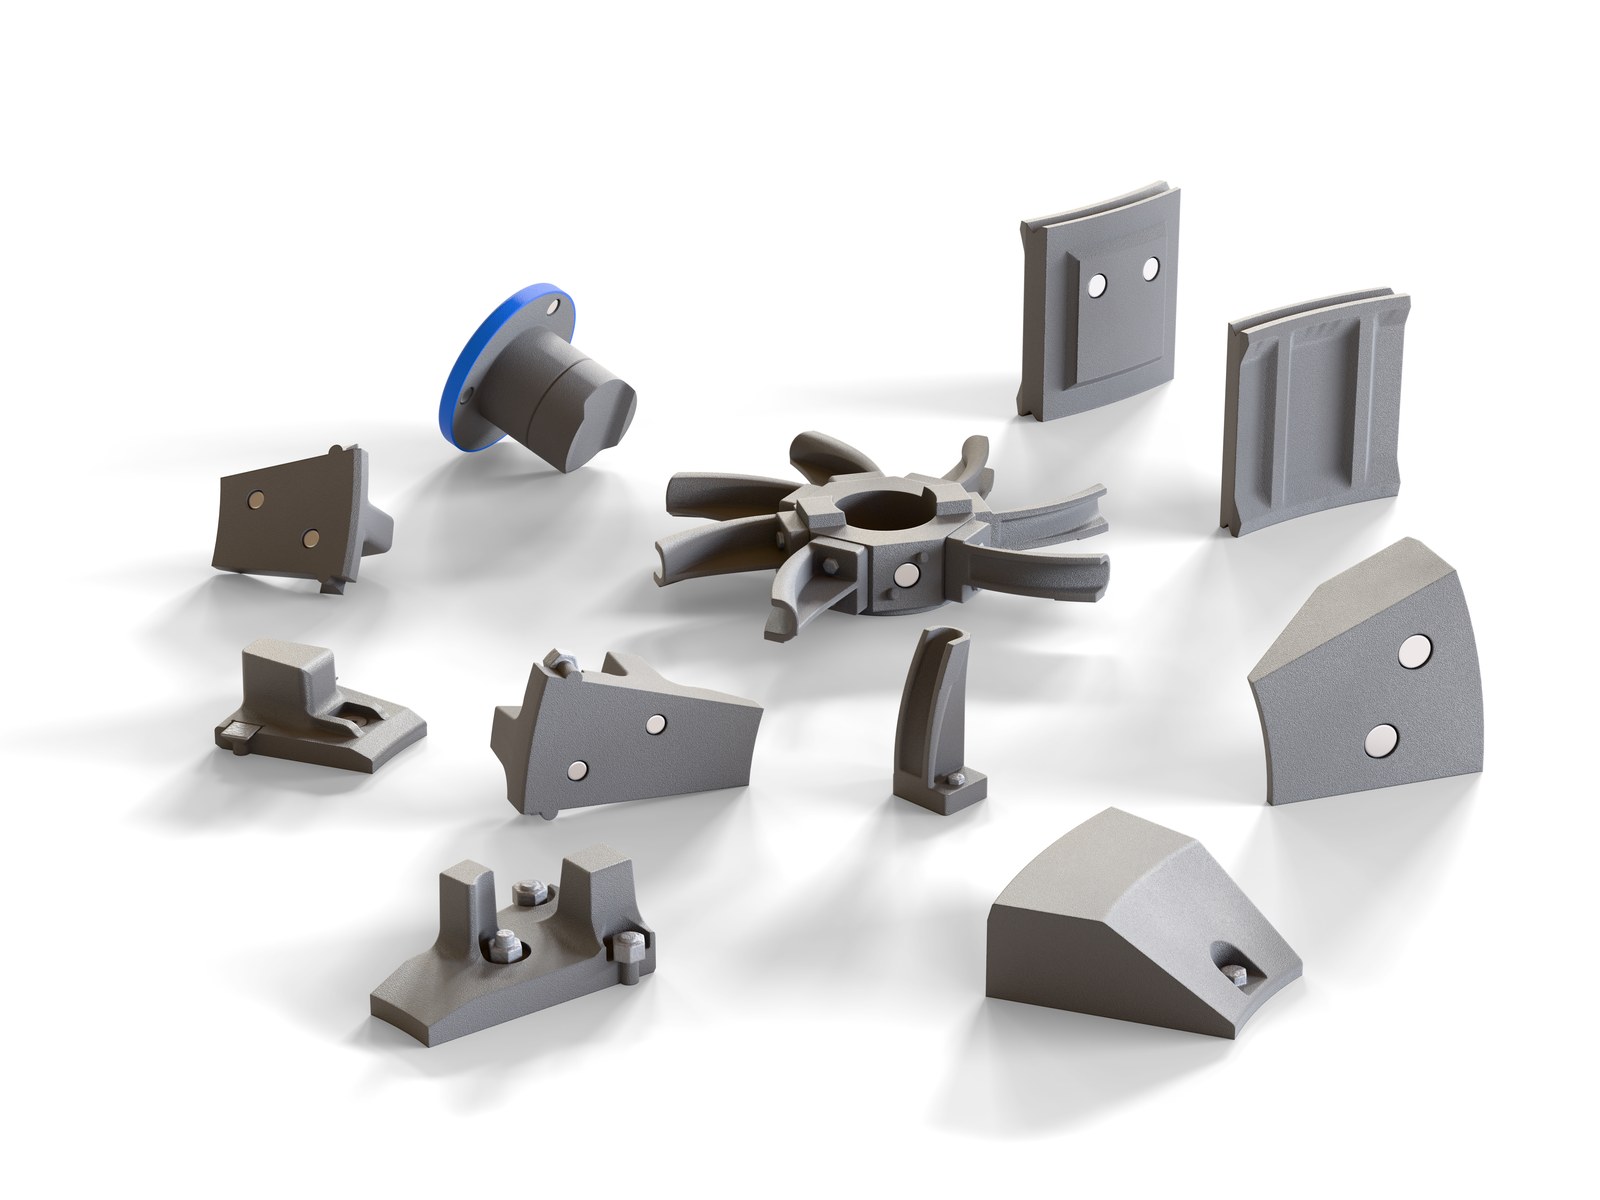
What yours could include
Interior detail
The parts inside modelled properly rather than left as an empty shell. Finished to the same standard as the outside, and visible wherever the model opens up.
Removable parts
Wear parts, guards and access covers that can be taken out and handled, held in place by magnets. Whole sub-assemblies too, where the machine is modular.
Moving parts
Doors and access panels on hinges, and shafts, rotors and drums running on ball bearings so they spin freely by hand. Belts, gates and sliding covers too, where showing the movement matters.
Other materials
Transparent panels where a guard needs to be seen through, and metal shafts where strength and a close running fit matter.
The plinth
Made to suit the model, in a choice of materials, with a nameplate if you want one.
How a model gets made
01
You send CAD
Whatever your engineers already have. I look at how it splits for printing, and what scale suits the space it has to fill.
02
Scale and prep
The production model is scaled and simplified: some assemblies merge into a single multi-material print, others stay as separate parts.
03
Test sections first, to prove the magnet, bearing and part fits. Then the full plates, which run for one to two weeks.
04
Assemble
Magnets, heat-set threaded inserts, bearings and fasteners, built so that most of the model can be taken apart again.
05
Mounting and delivery
A plinth specified to suit the model, and a box of spare printed parts if required. Larger models travel in sections for final assembly.
Practical details
Files accepted
A range of formats, including STEP, Parasolid, SOLIDWORKS and Fusion
Scale
Agreed per model and the space it fills
Finish
Printed in final colours, which removes one of the slowest steps in model-making
Lead time
Within eight weeks for most models, confirmed once I have seen the CAD
Most of the preparation is a one-off. A second model of the same design, a variant of it, or related equipment to stand alongside it all reuse the work already done.